Fitting and finishing

I'm well on my way to a denim wardrobe - I did used to know someone who was partial to wearing triple denim, so I may have to take some tips!

Constructing the skirt was really simple, especially as I've made it before. It's just the fitting that takes a while. A lot of trying it on inside out and pinning to get the shape just right.


*Note - If I was making something fancier I would've probably asked for some assistance with the fitting. It's pretty awkward to fit a garment properly whilst twisting, turning and pinning!*

After I'd got the fit down - and made sure I could sit down in it this time! - it just needed a few finishing touches.


Since using bias binding for the hem of a full skirted dress, I'm a complete convert. Neat and speedy to do, and I even managed to accidentally match it to my nail polish. I chose a nice contrasting colour for any little flashes of it that you might catch through the kick pleat. 


A bit of slip stitch to secure the waist facing in place and it's all done. 

Despite being one of the simplest garments I've made, I'd say it's probably the best in fit and finish. 


Almost holiday ready now! Just need to have a go at making a blouse to go with it too - well I do have enough denim...

C'est La Vie!

I'm soon to be visiting a place with a much warmer climate, but as a light-jacket weather sort of person, I face the small problem of having NO summer clothes. So with a holiday wardrobe in mind, I have a little bit of 'the fear' and need to get sewing!

My Sewing Bee pencil skirt has had quite a few wears, so I thought I'd make another, but one more suited to the season. At the time of making, I thought it would be great in a medium-light coloured denim, and it was quite an easy one to whip up, so I thought I'd give it a go.


I went to the local market with the right amounts in mind, but somehow managed to return home with enough denim to clothe B*Witched circa 1998...


I clearly have great ambitions to join B*Witched - hope there's enough denim to make a cowboy hat too!
I'd recommend this pattern for all levels of skill. It has real minimal pattern markings/tailor tacks and that's always the bit that I get most impatient with.


Just a bit of prep with basting the darts (4 in the front and 2 on each of the back pieces) and then you're ready to get sewing. I'm making it up in the size 12 measurements this time as I had to adjust the fit quite a lot last time.


Ready to get sewing... so C'est La Vie!

Polka party dress takes a spin (or two!)

After a few nights of furious sewing - and a bit of hemming on my lunch break(!) - I finished the dress, JUST in time to wear out. And wear it out I did. In fact, it got a couple of turns over the weekend.

Here are a couple of snaps before the night. I don't look very happy, but inside I'm cheering 'a dress that fits hooraayyyy!'


And a little bit of detail here...
I cannot believe I've never used bias binding to finish garments until now. WHY?! It finished off the raw edges under the arm perfectly. It was a lifesaver on the hem too. It saved all the pain and burnt fingers from trying to press the hem under, and I got to practice some more of my neat little uneven slipstitch - even if I was trying to balance it with eating lunch.

Also a little shot of the back, with zip fastening and hook and eye to secure. It's probably a little bit lower than I'd like it to be. I normally wear dresses and blouses with higher necklines though, so it's probably just something I'm not used to.

I'd say the neckline and shoulders are actually a bit big fit-wise. If I was to make the dress again I'd have to go with the size 12 measurements and do a bit of nifty pattern altering/magic to make the bust and bodice fit. And I can't believe I questioned the sleeves, they're great! Though the double thickness of fabric and shape of them make my shoulders look a bit odd if worn with a cardi. I guess it could be made using a thinner contrast fabric for the sleeve facing. I'd love to add some pockets at the side seam too.

Anyway, I can't nit-pick too much. I'm, pretty pleased with it over all! Here is a shot from wear #2. I went to visit friends for a garden party on a lovely sunny day.


And here I am (with all my chins) being SO HAPPY with to have a dress that fits and some sun!


Work In (polka) Progress

DIY
I've been spending my evenings slaving over my sewing machine and a hot iron- and I've watched LOADS of the Sex and the City box set while doing so. I have an event in mind that I'd like to wear my (currently unfinished) polka dot dress to... and it's SOON.


Notes on making so far:
  1. The basic shell of the bodice was quite simple to put together, though I thought I'd cut the side bodice in the wrong size at first. It turns out, there has to be a bit of extra fabric to allow a bit of give in the shaping of the bust. After taking care to match all the pattern markings properly, my panic was over. 
  2. I attached my skirt before taking in the side seams and doing a bit of grading to make the waist a better fit. This is probably cheating... or cutting corners at least. In future, I know it would be best to have a bit of patience and work these adjustments out on the pattern before jumping into the making. Although I have a nice smooth side seam now, it would save all the excess fabric at the seams and the unpicking/re-stitching game.
  3. The bust was pretty tricky to shape, but not unmanageable. I must have tried it on about 10 times already, as well as accidentally pinning it to my bra/me (ouch!) You can still see some pins at the top of the bust on the picture above. Just a few final tweaks now the skirt is attached and I've got the zip in place. *I will make this fit!*


It took a bit of work, but it feels so good to have got the fit of the bodice pretty much spot on. I was a bit unsure about adding the sleeves, but once I had the fit down, I thought why not?! Apologies for the badly lit mirror selfies and my pasty legs - must work out a better way to take pictures.

All that's left now is a bit of sewing to finish off the arms and hem, both with bias binding. So nearly WIP no longer!


Box pleat challenge

I'm continuing to thumb my way through the pages of the Sewing Bee 'Sew Your Own Wardrobe' book. I loved the box pleat skirt challenge that May and Patrick set early on in the series, so I thought I'd have a go for myself.
I went to Samuel Taylors (a fab haberdashery in Leeds, not too far from the Corn Exchange for those familiar with the city) to pick up supplies. They have a basement full of beautiful fabrics to browse and buy. I picked up a lovely medium-weight grey fabric for the box pleat skirt, and I have my eye on a few others for future projects. 
After last time's mis-measure I decided to make the skirt up in size 12 measurements, and luckily it fitted perfectly without needing any adjustments. A bit of tailors chalk and a hot iron sorted my box pleats, and I think I've just about mastered the lapped zip - though I did end up inserting it in the wrong side, oops! It only took me a Sunday afternoon and evening to make, and just a little while the next day to finish the hem.

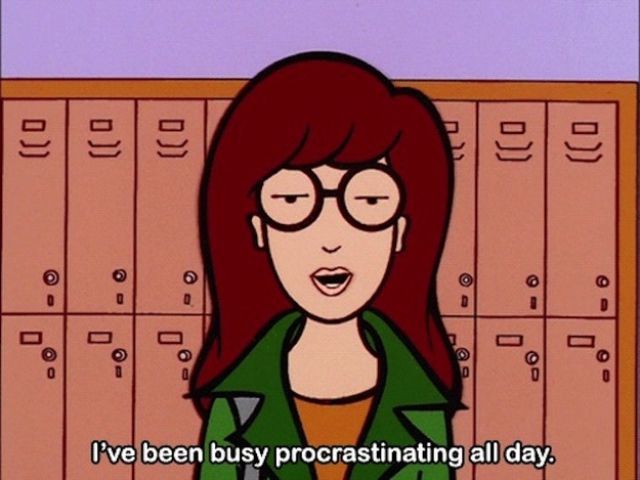
I'm channelling my inner Daria here in the finished skirt with super chunky Dr Marten's (that I've yet to wear in).
I can do girly too! Worn below with a vintage silk blouse I got from Stockport Vintage Village Fair a while back. 
It's such an easy skirt to wear, and pretty simple to make too - I'd definitely recommend giving it a go. The only thing I'd do differently is to use a medium-weight interfacing on the waistband rather than the recommended lightweight - it squashes up and creases a bit too much when sitting down.

Ready for the next challenge... Perhaps it's time to try a top or a dress.

Leftovers

DIY
I'm really pleased with the skirt that featured in my last post, particularly because it only really cost the price of the zip to make it! I raided my stash of fabric and found some leftovers from my last effort to start sewing seriously, which was about a year ago. I made this tartan skirt with a huge flounce from Cloth magazine.


I bought an excessive amount of fabric so I could match the plaid pattern at the seams, and it turned out pretty well... but then I've never worn it. I like it on the hanger but it just doesn't really suit me.

I learnt a few things while I was making it anyway:

  1. Up-scaling patterns by hand is a real pain - it takes more concentration and patience than I have.
  2. The photocopier at my local supermarket is SO frustrating to use, effectively upping my stress levels x1 million.
  3. Printing patterns and piecing them together isn't so fun, but at least I'm capable of cutting and sticking.
I ended up printing all 62 pages off and Sellotaping the whole thing together. 
I think I'll be sticking to pre-printed patterns in future! 


I still love the fabric and had plenty leftover, so I set off making a skirt that I would actually wear. The pattern is from the second Great British Sewing Bee book, which I'd really recommend. It has full sized patterns ready to trace (I used a roll of greaseproof paper as I couldn't find pattern/tracing paper anywhere!) and really clear instructions to follow.

The skirt itself is really simple to sew and reminded me of some of the basics, like creating darts and inserting zips - especially tricky when your sewing machine hasn't got a proper zipper foot! I also learnt how to do a pretty nifty uneven slipstictch for a nice, neat hem.

The new skirt has already had a few outings and has survived it's first run through the washing machine. I'm already planning a second version!


Here we go...

So this is my first blog post.
I'm Shauni, and I want to write about sewing and dressmaking, while I make every effort to get better and learn some new techniques. 


I love shopping for clothes, but I'm becoming increasingly fed up with the high street. I can't seem to find anything that I like, and on the rare occasion that something does catch my eye, I'm always disappointed to find that it's either completely out of my price range, or if not, it's made from pretty rubbish fabric.
I like vintage clothes, but not the 'trendy' vintage price tags/accompanying stains/trawling through rails for a 'dream' item that only exists in my mind. 

My mum is an avid knitter and she taught me how to sew too - we always used to make things. I studied textiles at school and got as far as making a couple of vintage-inspired outfits before I abandoned it to do a history degree and work in museums/education. 

I've made a few bits in the past few years, but recently I've found myself saying 'Oh I could make that...' over and over again, so I thought it was probably time to commit and give it a proper go. 

I chose the pencil skirt pattern from the new Sewing Bee book to ease me back into the swing of things...and you know what? It didn't turn out so bad! 

Ok, so I measured up wrong and had to do quite a lot of grading, but I did mange to make it fit my hips really well. A bit too well actually - I was worried the seams might burst I sat down! Thankfully they didn't!

I'm hoping this will be my first project of many!

Thanks for visiting!

Thanks for visiting!